Chapter 11 Low Light and Night Scenes
Low light is not daylight with a little less brightness. It is an entirely different state of light, where color, scent, distance, and mood are all transformed.
The Night Is Another City
When Brassaï photographed Paris by night, he was often confronted with an entirely different city. Narrow streets where the snow had just ceased falling, the thin mist hovering under lamplight, snow-draped walls, and emptied alleyways—none of it resembled Paris by day. With so little light, the camera had to be firmly anchored and exposures lengthened, for the light entering the lens was so scarce that it could only be gathered bit by bit across time; when the prints emerged from the darkroom, those images gave the impression that Paris was awake and alone in the dead of night. The snow on the walls held a bluish reflection, the streetlamps glowed an amber yellow, and the mist diffused each lamp into concentric halos—cool and warm tones thus coexisting side by side along the very same street. Daytime Paris belongs to tourists, storefronts, and traffic—clamorous, crowded, hurried; come nighttime, the city suddenly falls quiet, like a place newly discovered, as though no one had ever truly seen it before.
He continued photographing this nocturnal Paris over several consecutive years, collecting the work in late 1932 into the book Paris de nuit. The true significance of that volume did not lie in proving that one could photograph clearly in the dark—had it been only that, it would amount to little more than a technical demonstration; its far more essential contribution was in helping us see something else: once light recedes, a familiar place redistributes its own visual weight. In daylight, what is most conspicuous is invariably the signage and the crowds, which claim virtually all attention; but once darkness falls, these elements recede to the background, while a single lamp, a stretch of wall, a wisp of mist, or the shadow cast by a figure at a street corner surfaces one by one, becoming far more vital than they ever were by day. Night does not conceal the city; it merely adopts a different logic to decide anew who and what ought to be seen.
Herein lies the core problem of low-light photography. Stepping into a darkened scene, most people's immediate impulse is to ask anxiously, "There isn't enough light—how do I compensate?", as though darkness were a defect that must be repaired without delay. Yet the question far more worth asking points in nearly the opposite direction: once light diminishes, what ought naturally to vanish, and what, on the contrary, ought to be preserved? In other words, what you must manage is not an absence of light, but an act of selection. Night is not a defective version of day, nor is it an unfinished sketch waiting to be illuminated; it possesses its own internal order, and darkness itself is an indispensable part of that order. For this very reason, whether you can succeed in low light depends to a large extent not on how powerful the gear in your hands is, but on whether you are willing to acknowledge this truth from the start, rather than stubbornly attempting to pull the scene back to daytime brightness.
Darkness Does Not Mean a Lack of Gradation
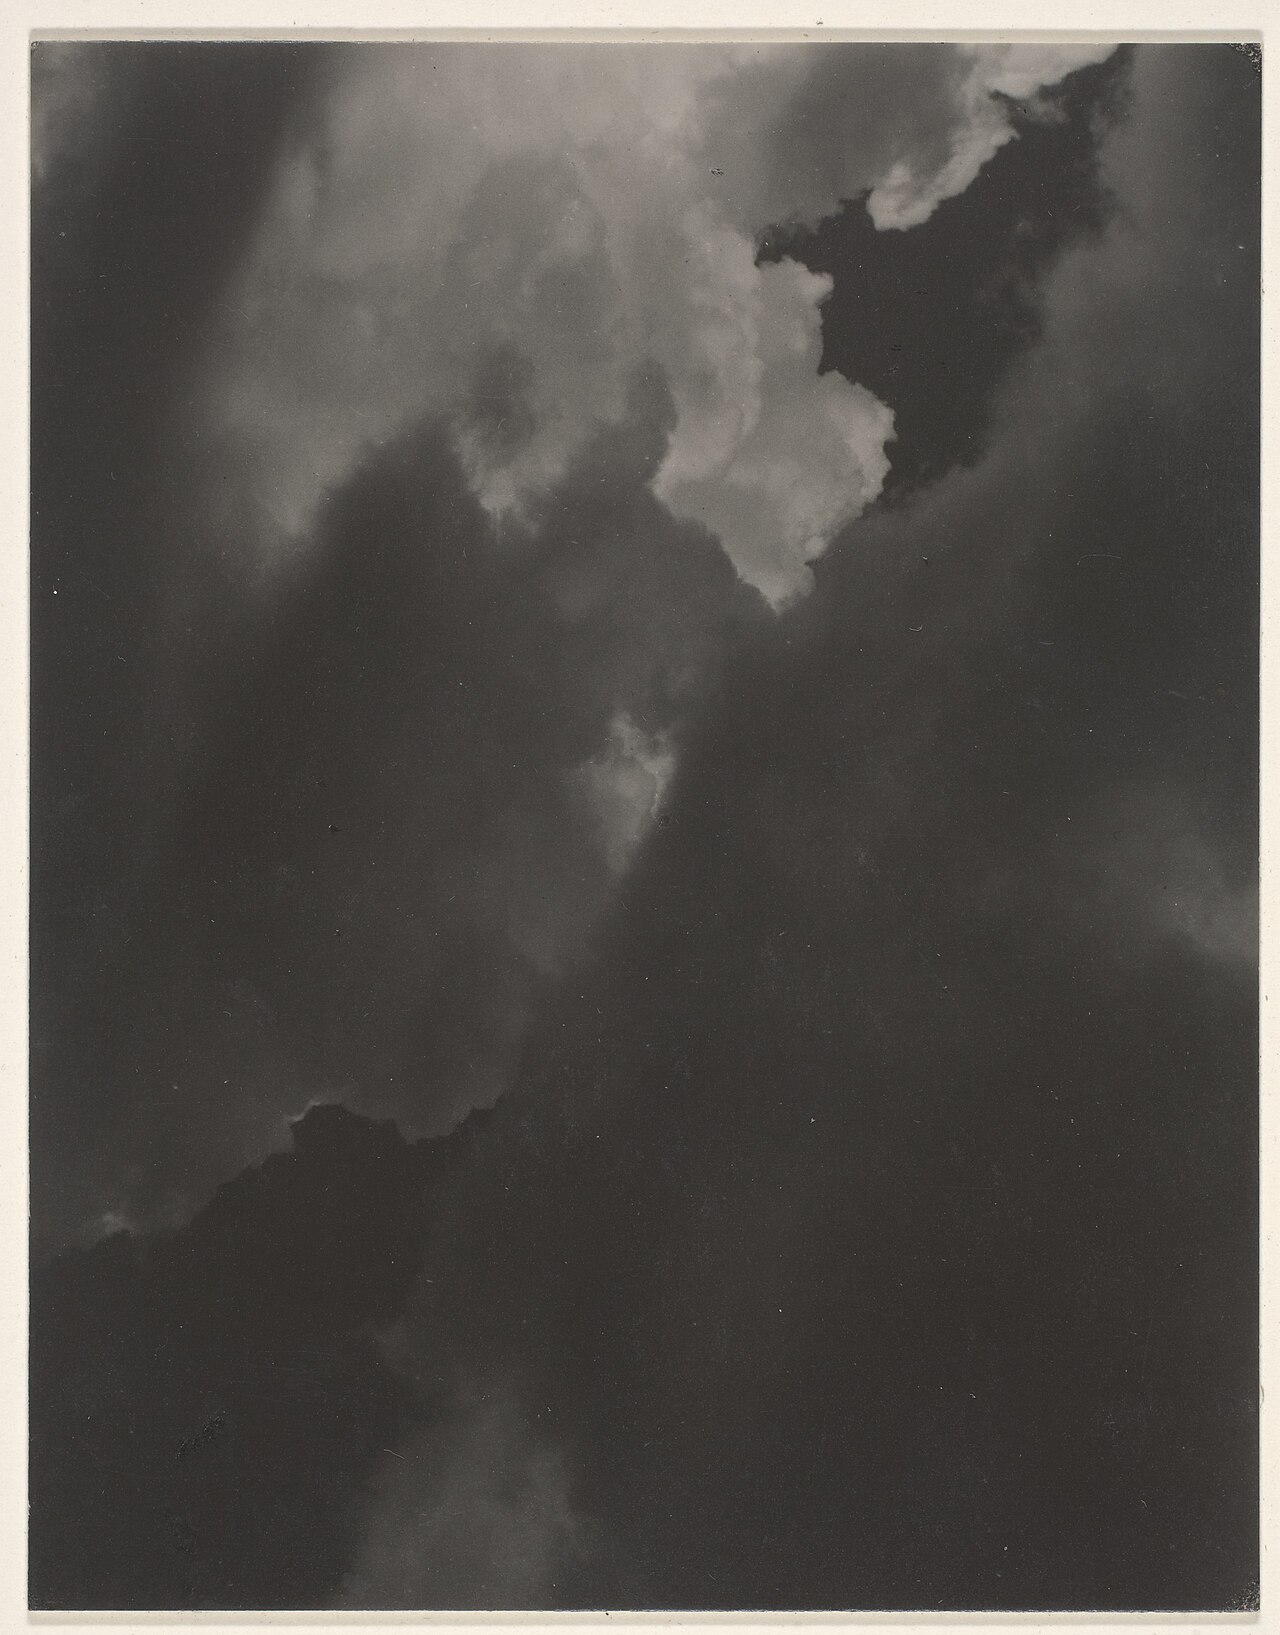
Alfred Stieglitz, "Equivalent," 1925. Stieglitz began photographing clouds in 1922, a pursuit that spanned more than a decade; from around 1925 onward, this body of work continued under the title Equivalents. These photographs contain no landmarks and record no specific events—only clouds, values of light and dark, and forms. He sought to demonstrate that photography need not always depend on concrete subjects, but could, like music, express an internal state of mind. To him, the low light, tonal gradations, and contrast of a single cloud were the very feeling of that moment. Image Source and Reuse Notes
First, Distinguish What Kind of Low Light You Face
Low light is not a single uniform condition. Lumping it together under the generic term "darkness" will only lead you astray, for different forms of dark arise from different causes and carry different temperaments; attempting to tackle them with a rigid, one-size-fits-all approach almost always leaves you empty-handed on both counts. Broadly speaking, it presents at least two distinct faces, each requiring a completely different approach.
The first kind consists of scenes where the environment itself is naturally dim: a café at night, a museum shortly before closing, a church lit by candles, a living room illuminated by only a single table lamp, or a solitary streetlight at a rural crossroads. What these scenes share in common is that light sources are sparse and weak, illuminating only very small areas; the light falls off with every step it travels away, so that once beyond the source, the frame rapidly sinks into deep shadow; colors also tend to skew warm, because tungsten filaments, candlelight, and small bulbs have inherently low color temperatures, naturally casting an amber-yellow glow. This is, in fact, the most ancient form of light, and the one most deeply familiar to human experience. When Vermeer painted interior figures, this was precisely the light he used: a single window ushers the light indoors, illuminating only a portion of the subject's face, table, and wall, while the rest fades gently into darkness with distance—leaving no harsh boundary between highlight and shadow, only a soft, continuous gradation. Today, when you photograph someone in a café with a 35mm f/1.4 lens, across a span of centuries, you are essentially doing the exact same thing: preserving the warmth and direction of that modest light, faithfully and intact, within the frame.
The second kind is the night dominated by artificial light: city streets, neon signs, performance stages, concerts, and shopping mall facades. When shooting such scenes, the trouble is rarely too little light; on the contrary, there is often too much of it—the real difficulty lies in its sheer chaos. Red signboards, blue LEDs, green neon, white headlights, cool-white smartphone screens, and warm-yellow display windows crowd into the very same frame, each source carrying a different color temperature, none willing to yield to another. Tokyo's Shinjuku, Hong Kong's Mong Kok, and countless commercial avenues ablaze with illumination after nightfall all fit this description. The visual impact is formidable, yet precisely because the colors are so densely packed, it tests your ability to bring order to the frame all the more severely. Confronted with such a tangle of color, you have essentially two paths: either single out a dominant hue to command the entire frame, relegating all other colors to subordinate roles as mere accents; or embrace the disorder outright, treating the visual chaos itself as a source of energy and allowing the full riot of colors across the frame to clamor together. The worst pitfall is hovering between the two—neither establishing a dominant color nor letting go with conviction—so that every hue shouts at equal volume, leaving the image looking muddy and dirty, as if someone had accidentally overturned a painter's palette across the floor.
Noise Is First and Foremost a Light-Gathering Problem
Chapter 3 has already fully explained shot noise, read noise, and ISO; here, we retain only the practical conclusion for working in low light: the primary reason an image often appears noisier at high ISO values is that the aperture and shutter speed permitted too little captured exposure, not that the ISO number conjured all the noise out of thin air. ISO alters gain, brightness, and highlight headroom, and it may alter read noise; what it cannot do is restore photons that were never collected in the first place.
Therefore, secure the non-negotiable conditions of the photograph first. If subjects are moving, raise the shutter speed until it is fast enough to render the motion, open up the aperture, and finally let the ISO make up whatever output brightness is needed; only when the scene is static should you rely on a tripod, image stabilization, or physical support to lengthen the shutter speed. Never trade irreversible motion blur for the sake of a cosmetically pleasing, low ISO number.
Extremely long exposures may also reveal hot pixels, dark current, and fixed-pattern noise; these belong to a different class of problems than ordinary handheld night shooting. Whether to enable in-camera long-exposure noise reduction depends on whether the scene allows you to wait: the camera typically takes a second dark frame of equal duration, which can suppress some fixed patterns and hot pixels, but also forces you to wait just as long before the next shot. For continuous shooting opportunities such as star trails or fireworks, you must weigh the intervening downtime beforehand; in post-production, RAW files can instead be treated with dark frames, hot-pixel mapping, or multi-frame stacking.
Dual Conversion Gain Is Not Dual Native ISO
As noted earlier, read noise reveals itself in weak signals, and Chapter 3 has already distinguished between dual conversion gain and what manufacturers market as "dual native ISO." Rather than rehashing the underlying mechanisms here, we retain only the practical conclusion in the field: do not treat the ISO number itself as a badge of dishonor in low light, and never sacrifice the shutter speed your subject demands merely to force down the ISO. On certain camera bodies, crossing the gain-switch threshold lowers read noise, but it may simultaneously reduce highlight headroom; furthermore, that threshold varies across stills, video, RAW bit depths, and log/gamma curve modes. Unless you have consulted reliable technical documentation for your specific camera model, letting Auto ISO operate continuously is generally far more dependable than forcing a jump to some rumored "second native point."
Sensor Format, Pixels, and Total Light Gathering
Precisely because image quality is rooted in "how much total effective light was collected," the margins afforded by sensor format and fast lenses become tangible in low light. At an identical angle of view, shutter speed, f-number, and comparable sensor technology, a larger sensor generally gathers a greater total volume of light, and therefore final images viewed at the same print or display size tend to look cleaner; the reason is not that "every pixel on a larger format is necessarily bigger," since pixel size also depends on resolution. A large aperture, meanwhile, increases exposure per unit area from the opposite end: f/1.4 delivers two stops more light than f/2.8, allowing you to drop from ISO 6400 to 1600 at the same shutter speed. The trade-offs are a shallower depth of field, optical aberrations, and altered focusing tolerances. When the subject is motionless, a tripod allows you to lengthen the shutter speed directly—often far more effective than pursuing ever-larger apertures; only when the subject is in motion must you rely on aperture and ISO to defend your speed.
Flash and small LED fill lights should not be treated as taboos to be dismissed out of hand; they simply demand restraint. The mood of low light inherently springs from shadows that are allowed to recede and whatever faint illumination originally inhabited the scene; if the fill light is too bright, abruptly blasting the subject with stark illumination, the figure looks as though it were violently cut out from the background and pasted back in—hard-edged, jarringly out of place, instantly shattering the night's organic unity. The sound approach is to dial the fill light down extremely low, to the point where its presence is barely perceptible, allowing it merely to lift an eye, a cheek, or a hand gently out of the darkness, while surrendering everything else back to the night.
Dialing down the power is only half the battle; the other half lies in color. Under tungsten lighting, you can fit a CTO gel over the flash to bring the fill closer to the ambient color, then set the white balance to a compromise acceptable to both; yet modern urban LEDs, neons, and streetlights do not all sit at 3000K, nor do they necessarily fall along the same color temperature axis, so a single CTO gel cannot resolve every mixed-light situation. When shooting slow-sync flash, the choice between front-curtain and rear-curtain sync likewise depends on motion: use rear-curtain sync when there is directional movement and you want light trails trailing behind the subject; when you need to freeze a facial expression immediately upon release, or when the subject might leave the frame before the exposure ends, front-curtain sync offers greater control. There is no rule in night photography that one "almost always ought to use rear-curtain sync."
Not every scene accommodates a tripod; often you have only your two hands, and so just how slow a shutter speed you can handhold becomes an unavoidable calculation in low light. When discussing safe shutter speeds in Chapter 3, we cited a classic rule of thumb: the shutter speed should generally be no slower than the reciprocal of the focal length—meaning roughly 1/50s for a 50mm lens. Any slower, and the faint, imperceptible tremor of your hands will smear the frame into blur. Yet in low light, this threshold is often inadequate; when the light is so meager, 1/50s is still far too fast, and what you really need is to drop the shutter speed several stops lower.
Here, image stabilization becomes a genuine margin of safety. Both in-body image stabilization (IBIS, mounting the sensor on a microscopic actuation mechanism to counteract hand shake in real time) and optical image stabilization (OIS, tasking a movable lens element within the optical group with the same job) can push the threshold for safe shutter speeds down by several stops. Manufacturers routinely claim four, five, or even more stops; in practical handheld shooting, this means a scene where you could once barely hold steady at 1/50s might remain crisp all the way down to 1/4s with stabilization engaged. This is equivalent to gaining several stops of light out of thin air, allowing you to pull the sensitivity down by a substantial margin and naturally rendering noise far lighter.
Yet here lies a boundary that is easily overlooked but essential to keep in mind: stabilization stabilizes the camera, not the subject being photographed. It can counteract the trembling of your hands, but it has no control over a moving subject within the frame. Whether a passing pedestrian, a raised hand, or a driving car is rendered sharp depends solely on whether the shutter speed is fast enough, having nothing to do with stabilization. Consequently, the stops bought by image stabilization can only be safely applied to static scenes: quiet streetscapes, stationary architecture, or seated, motionless people. The moment the subject moves, you must push the shutter speed back up to an adequate rate, preferring to trade a high ISO for speed rather than expecting stabilization to freeze action—on this front, it cannot help. As for how fast is fast enough, that depends on the vigor of the movement: someone standing still and swaying slightly can often be held reasonably sharp around 1/60s; if they are walking across the frame, you will usually need 1/125s to 1/250s; for rapid actions like running or dancing, you must push further to 1/500s or faster. Having such a baseline firmly established in your mind is what enables you to judge just how much sensitivity you must sacrifice for the sake of speed.
Focusing Methods in Low Light
In low light, the first thing to falter is often not noise, but autofocus. Modern mirrorless cameras typically combine phase detection, contrast detection, and subject recognition, going well beyond merely "seeking adjacent bright and dark patches"; yet every method requires sufficient signal, texture, and effective aperture. A pitch-black wall, a starless night sky, or a face so dim it lacks discernible edges will all destabilize distance estimation. The remedies remain concrete: move the focus area to a clear edge at the same distance—such as the outline of a lamp, lettering on a sign, or hair and eyes highlighted by rim light; when necessary, temporarily magnify the live view, turn on the AF-assist illuminator, or switch directly to manual focus. If you focus first on a surrogate target at the same distance and then recompose, verify that both truly share an identical focal plane; under large apertures, "looking about the same distance away" may not be close enough.
If autofocus is genuinely helpless, switch decisively to manual and reclaim control for yourself. Engage magnified live view to examine a portion of the frame in detail, or turn on focus peaking so that in-focus edges shimmer with a distinct highlight, and then smoothly turn the focus ring until the edges are at their crispest. When shooting starry skies, auroras, or deep nighttime landscapes, manual focus is inherently more reliable than autofocus for that very same reason: such scenes offer virtually no contrast to feed the camera, and rather than waiting for it to hunt back and forth, it is far better to set the focus directly by hand in one pass. For street photography at night, you can also employ zone focusing: stop down the aperture slightly to deepen the depth of field, and set the focus to a pre-estimated distance; in doing so, an entire swath of space before the lens will fall within the depth of field. To give a concrete, ready-to-use example: with a 28mm lens stopped down to f/8, manually set focus to roughly 3.3 meters—the hyperfocal distance for these settings—and everything from approximately 1.6 meters all the way to infinity will fall within acceptable sharpness. This is precisely how the hyperfocal distance discussed in Chapters 5 and 9 applies at night; if you carelessly focus closer than the hyperfocal distance, the far end will fail to reach infinity, as shown by the exact figures in the Chapter 8 table. Since most pedestrians on the street pass right through this zone, you no longer have to wait in the dark for the camera to confirm focus with every shutter click, freeing your attention to watch the people and the light on the street.
Choosing Between Blur and Noise
Low-light photography, in the end, often comes down to choosing between two competing costs, each exacted at the expense of the other. Raising the ISO introduces noise, but in return buys you the shutter speed needed to freeze the subject sharp and solid. Lowering the ISO yields a cleaner, more pleasing image, but at the cost of a slower shutter—the slightest movement from the subject, and everything blurs. Each path entails its own loss; how you choose depends entirely on what stands before your lens. For stationary subjects like still lifes, architecture, and landscapes, you can unhurriedly set up a tripod, trading exposure time for pristine image quality and sparing the frame unnecessary noise. For people, street scenes, and stage performances, the priority reverses: it is far better to allow a higher ISO and a grainier image in order to secure sharpness in the action first. The underlying reasoning is simple: noise left for post-processing can still be addressed through numerous remedies and mitigated to some degree; but motion blur, when unintended, is almost impossible to salvage—no amount of adjustment will ever pull it back into crisp focus.
It is equally vital to remember that so-called "correct exposure" in low light does not mean dragging the subject's brightness all the way up to daylight levels. These two notions are easily conflated, but in truth they could not be further apart. Consider someone reading by a window in a café: if you brighten their face until it glows like an ID photo, the exposure may appear technically "accurate," yet the inherent darkness and quiet of the room vanish along with that illumination, leaving an image as dull and flat as a snapshot taken under a ceiling light. A far better approach is to let the face rest just slightly brighter than its surroundings—clear enough to see the person and read their expression, yet leaving the photograph unmistakably belonging to the night. Ultimately, shadows here are neither voids nor defects born of flawed technique; they are integral, indispensable elements of the composition itself. A figure standing beneath a streetlamp with darkness pooling all around; a building with only a scatter of illuminated windows while the rest sinks into shadow; a hand caught in the glow of a desk lamp, the outer edge of the tabletop receding slowly into the dark. It is precisely these shadows that bring stillness to the photograph, and through their foil, give weight to the small fragment that is lit.
The mechanics of full-well capacity, read noise, dynamic range, and ISO invariance were detailed in Chapter 3. Applied to a low-light scene, one need only remember this: once critical highlights clip, they cannot be recovered; and if vital shadow regions receive too little light, they will sink irreversibly into noise. Your task is to distribute between these two extremes the information the photograph truly requires, rather than forcing every corner of the frame to achieve uniform brightness.
Across certain ISO ranges on particular camera bodies, recording at a lower ISO with the same aperture and shutter speed and lifting the exposure in post-processing can yield noise levels comparable to in-camera gain while preserving more highlight headroom. Yet this behavior depends on conversion gain, RAW mode, and readout circuitry; it does not imply that "all camera bodies should be underexposed at low ISO," nor should it ever come at the expense of shortening the shutter speed and curtailing the actual light gathered. In the absence of reliable testing, rely primarily on highlight warnings and the final output for your judgment.
The formula defining signal-to-noise ratio as \(\sqrt{N}\) conceals a more modern, far more radical corollary: if a single exposure cannot gather enough light, simply take multiple shots and stack them together. If you shoot four consecutive frames of a static scene and average them, the signal remains identical while random noise cancels itself out by half in the averaging process, exactly doubling the signal-to-noise ratio—mathematically equivalent to quadrupling the total light gathered. Eight frames, sixteen frames, the gains follow this same square-root progression. This is multi-frame image stacking for noise reduction. It violates no laws of physics; it merely frees the process of "gathering more light" from a single exposure and distributes it across many. Your smartphone's Night Mode performs precisely this feat: during the two or three seconds after you press the shutter, it captures a rapid burst of a dozen frames, aligns them, stacks them, averages them, and outputs a bright, clean image. A tiny sensor, assisted by algorithms, cobbles together the amount of light that would otherwise require a large sensor in a single exposure. This is the true engine behind the dramatic leaps in smartphone night photography over recent years—what the industry calls computational photography. Dedicated camera users can employ the very same technique: for night landscapes on a tripod, rather than struggling through with a single high-ISO shot, you are far better off firing a burst of ten frames to stack later in post-processing; in astrophotography, aligning stars and stacking to reduce noise has long been standard practice. Its limits are equally clear: anything that moves within the frame cannot endure stacking—pedestrians, traffic, swaying branches all result in ghosting—making it the exclusive domain of static scenes.
ETTR remains applicable in night scenes, but the goal is not to push the entire histogram flush against the right edge. First distinguish between specular highlights that can be blown to pure white—such as the core of a light bulb—and areas where texture must be preserved, such as illuminated signs, the surface of the moon, or lit skin. Guard the latter using the RGB histogram and highlight warnings; only when headroom remains should you continue to increase exposure at capture. The vast low-key tonal expanses characteristic of night scenes are meant to sit on the left; there is no need to haul them up into daylight simply to fill out the graph.
Nor is there any need to wage total war on noise; eradicating every last trace is rarely a virtue. In color low-light photographs, applying moderate noise reduction while preserving a subtle tactile grain is usually sufficient. In black-and-white, noise need not be avoided at all; one can lean into it as photographic grain, letting it become part of the image's tactile character. The cost of over-aggressive noise reduction is tangible and unappealing: skin begins to resemble lifeless plastic; hair looks as though it were smeared with a blunt brush, losing the distinct separation of individual strands; and shadows are flattened into dead, airless planes stripped of tonal nuance. Choosing between two evils, it is far better to retain a touch of roughness than to buff the night so smooth that it ceases to breathe.
To execute noise reduction seamlessly, one must first understand that the noise you confront presents two distinct faces, and each should be handled separately. Zoom in closely on a high-ISO image, and you will notice that the artifacts divide into two types. The first consists of granular variations in tone—stippled light and dark specks, like a veil of fine sand—known as luminance noise (noise that fluctuates solely in brightness without color). The second consists of chromatic blotches—splotches of rogue magenta and green floating across what should be a uniform color plane—known as chroma noise (noise that carries erroneous color information). These two types of noise carry very different perceptual weights: luminance noise closely resembles traditional film grain, and kept in moderation, it is far from objectionable, often lending a tactile organic texture to the frame. What truly offends the eye and immediately betrays a harsh digital look are those blotchy magenta and green chroma artifacts.
Because the two differ so markedly in appearance, virtually every competent noise reduction tool splits them into separate sliders, allowing you to address each independently. The sound approach is to deal aggressively with chroma noise, smoothing away those chromatic splotches as completely as possible, since suppressing them costs very little fine detail. With luminance noise, by contrast, exercise restraint: pull it back only until it ceases to be distracting, leaving a touch of grain in the image to preserve its underlying texture and breath. This trade-off is fundamentally the same tension between noise reduction and sharpening that we will examine closely in Chapter 13: apply heavy-handed noise reduction and the image certainly turns clean, but fine details are erased in the process, turning hair, fabric, and skin textures into a mushy blur; apply too light a touch, and while detail is preserved, noise asserts itself once more. The art of low-light post-processing rests largely on finding the balance along this fine line.
A Slow Shutter Can Be an End in Itself
Slowing down the shutter is originally an unavoidable compromise in low light, yet certain subjects work in reverse: they exist solely by virtue of this slowness. Long exposure thus transforms from a reluctant concession into a deliberate artistic technique. The most common of these is traffic and light trails. On city streets, headlights and taillights are constantly on the move. If you shoot with an ordinary shutter speed, you capture merely a few static points of light frozen in a single instant—scarcely compelling. But once you extend the shutter to several seconds or even dozens of seconds, these moving lights trace continuous ribbons of red and white across the frame. The vehicles themselves, because they remain in perpetual motion and linger at any given spot for too brief an instant, vanish entirely from view, leaving behind only the luminous trajectories of their passing. To capture images like this, a tripod is an absolute prerequisite. Stop down the aperture to f/8 or f/16 to ensure sufficient depth of field while naturally stretching the exposure time even further; dial the ISO down to its base setting to preserve image quality; and leave the rest for time to accumulate.
Here lies a practical and easily overlooked detail: the physical act of pressing the shutter release imparts a slight vibration to the camera, and during an exposure lasting several seconds, this subtle tremor is enough to soften or blur the entire image. The repertoire of techniques for bringing the camera to total stillness—a cable release or a two-second self-timer delay, mirror lock-up on DSLRs, and electronic front-curtain shutter on mirrorless cameras—was covered in Chapter 9 when discussing slow shutter speeds; at night, not a single one can be dispensed with. These measures may seem trivial, but they frequently mark the watershed between a crisp long exposure and a ruined one.
Taking long exposure a step further leads to an even more deliberate technique known as light painting (using a mobile light source to draw within the frame during a long exposure). Its principle is straightforward: throughout the seconds or dozens of seconds the shutter remains open, the sensor accumulates all incoming light across that duration. If you hold a flashlight, a glow stick, or an illuminated smartphone, waving it and moving about in front of the lens, the path it traces will be recorded on the sensor like strokes from a pen. Broadly speaking, light painting has two primary applications. The first is treating the light source as a brush to write words, draw lines, or trace shapes directly in mid-air. The second is treating it as a mobile lantern, using the light during the exposure to gradually illuminate an element of the scene that would otherwise remain submerged in shadow—a tree, a wall, or the interior face of a cave. When it comes to camera settings, the sequence is to first establish a base exposure for the ambient environment, and then paint within that window of time: for instance, at f/8 and ISO 100, with the shutter set to Bulb mode or dialed directly to thirty seconds, take an initial test shot without painting to dial in just the right brightness for the night sky and surroundings; then begin the next exposure, stepping into the frame to move your light source. Wear dark clothing and keep moving constantly, never lingering in any single spot for more than a second or two; because the light source is in continuous motion and you yourself are dark, scarcely a trace of your presence will register in the image. What remains in the end are solely the lines you have drawn with light and the selected areas you have illuminated.
Distinct Strategies for Different Night Scenes
Different low-light scenes each have their own temperament and distinct priorities; it is best to examine and commit each to memory separately.
In cafés and restaurants, the primary concern is identifying a single light source. Natural light by a window works, as does a warm table lamp—the specific choice matters little. What must be avoided at all costs is having two distinct light sources illuminate the same face simultaneously: one side catching the cool daylight filtering through the window, the other bathed in the warm glow of an indoor lamp. The face ends up split down the middle—half blue, half yellow—and reconciling these two competing color temperatures in post-processing is virtually impossible to do naturally. The remedy is to move the subject rather than sit in place struggling to manipulate the colors. Have them shift closer to the window to catch only window light, or move further away to shake off the cool daylight entirely, leaving only the warm table lamp. When shooting, resist the urge to brighten the entire scene; let the table corners, chair backs, and room's deeper recesses recede into shadow as they naturally would. Against that surrounding darkness, the touch of light defining the face gains far greater presence and weight.
Museums and churches present a more idiosyncratic set of circumstances: tripods and flash are almost universally banned, and moving around noisily is out of the question—effectively cutting off your most effortless solutions before you even begin. In these settings, your own body becomes your only portable tripod: lean against a wall or pillar, tuck your elbows tight against your torso, and trip the shutter at the bottom of an exhalation. Combined, these physical adjustments significantly steady the frame, buying you an extra stop or two of shutter speed. Avoid hunting for autofocus against an expanse of dim, featureless wall; lacking contrast, it will only result in wasted effort. Instead, find the edge of a sculpture, the intricate pattern of a stained-glass window, the illuminated rim of a candlestick, or the contour where light grazes a human face. Darkness here is by no means an error: church interiors are meant to harbor deep, shadowy recesses—that is precisely the wellspring of their atmosphere. If you greedily lift every column and ceiling panel into the light, that singular, solemn stillness will simply vanish along with the shadows.
For night street photography, the trick is to identify a dominant color first, then wait for your subject. Amid the visual clutter of the street, single out a color strong enough to command the entire frame—a red neon sign, a green shopfront window, a row of blue fluorescent tubes. Establish this as the visual anchor of your composition, stake out your position, and wait patiently for someone to walk into that pool of light. Streets at night are awash in far too many hues; if you greedily attempt to capture them all from the outset, the frame easily descends into chaos, with no single tone asserting control. By settling on a dominant color first and only then deciding which secondary colors to keep or suppress, your visual thinking becomes infinitely clearer.
Concerts and stage performances call for the opposite approach: your foremost priority is protecting the highlights. Faces caught in harsh spotlights blow out with alarming ease, and once highlights clip, they can never be recovered, leaving behind only dead, textureless white. By contrast, a pitch-black background is entirely acceptable—the stage, after all, emerges organically from darkness. In terms of camera settings, a dependable starting baseline is: spot metering locked onto the illuminated face, a shutter speed of at least 1/250 s (a performer's stage movements are almost always more vigorous than expected), aperture wide open, ISO set to Auto, and exposure compensation dialed down by -2/3 stop to safeguard facial highlights. Forget about flash altogether: virtually all live performances strictly prohibit it, and across a distance of dozens of meters, it would be useless anyway. Stage work offers one unique asset you can leverage: lighting is pre-choreographed. Once a light cue cycles a few times during a song, you can anticipate precisely which musical phrase brings the brightest, most striking illumination; raising your camera in advance to wait for that moment is far more composed than frantically chasing shifting beams of light. Finally, always shoot in RAW. Stage lighting, especially red and blue lasers, presents the most extreme mixed-light conditions; a red channel completely blown out in a JPEG can often still be partially rescued in RAW. Ultimately, a photograph in which only the singer's face, hands, and microphone are illuminated while everything else dissolves into shadow remains completely whole—and often far more powerful than an image lit from corner to corner.
City skylines are best captured during the blue hour rather than waiting until total darkness sets in. Set your camera on a tripod, stop down to f/8 or f/11, pull your ISO down to 100, and extend the shutter speed to several seconds or even tens of seconds, allowing time to steadily accumulate that meager ambient light. At this juncture, the sky retains a deep indigo cast while the interior lights across the buildings are just beginning to glow one by one. This interplay of cool ambient tones and warm artificial light within a single frame produces the most harmonious and visually compelling balance in night photography.
The brightest celestial body in the night sky—the moon—warrants a dedicated rule of its own, as it represents the single most common stumbling block for beginners shooting at night. If you expose the entire frame according to standard night-scene logic, the moon will inevitably blow out into a textureless white disc. The explanation is simple: the moon is a sunlit rock floating in space; it is effectively experiencing "bright midday sun," making it over ten stops brighter than the rest of the nightscape. Photographing the moon itself therefore follows daytime rules—known in photography as the Looney 11 rule, a direct counterpart to the Sunny 16 rule: set your aperture to f/11 and shutter speed to 1/ISO seconds, and a full moon will achieve roughly accurate exposure, preserving the tactile relief of craters and lunar maria. Capturing both the moon and the foreground landscape with full detail in a single exposure is virtually impossible; you must either shoot during the brief window of blue hour when the sky is still bright and dynamic range has not stretched beyond reach, or capture bracketed exposures to blend in post-production. Conversely, moonlight can serve as a primary light source: exposing snow-covered mountains or open sea under a full moon on a tripod for dozens of seconds to several minutes yields an image resembling a crisp, cool-toned daylight scene—shadows faint and blue, with stars still glittering overhead. This genre of moonlit landscape forms a distinct and captivating aesthetic within low-light photography.
For astrophotography, the initial imperative is escaping light pollution and leaving urban illumination far behind. This "escape" can be executed with systematic precision: astronomers classify night skies using the Bortle scale, where Class 1 corresponds to pristine wilderness where the Milky Way is bright enough to cast visible shadows on the ground, while Classes 8 and 9 designate inner-city cores. Generally, once you reach an area rated Bortle Class 4 or below, the Milky Way becomes discernible to the naked eye. Online light pollution maps are color-coded according to this scale; consulting one prior to departure is vastly more dependable than driving aimlessly for two hours on intuition alone. The Milky Way also follows its own seasons and celestial orientations: in the Northern Hemisphere, capturing the richest portion of the galactic core requires clear skies from late spring to early autumn, looking toward the southern horizon. Furthermore, time your shoot around the new moon when lunar light is at its weakest. Manually adjust focus until stars appear at their smallest, sharpest pinpoints, and ensure your composition incorporates a silhouette in the foreground—a mountain ridge, a solitary tree, a cabin—lest the frame dissolve into an isolated field of stars adrift without visual anchor.
The aurora introduces yet another layer of complexity beyond astrophotography. To begin, here is a dependable set of baseline parameters: an aperture of f/2.8 or faster, ISO 1600 to 6400, and a shutter speed adjusted according to the aurora's activity. A faint, static green arc can tolerate an exposure of around ten seconds; the moment the curtains begin dancing vigorously across the sky, however, the shutter must be shortened to one or two seconds. Otherwise, those undulating folds will blur under long exposure into a formless haze of light. In this regard, auroras are the exact opposite of starscapes: astrophotography suffers from underexposure, whereas the aurora suffers from overlong exposures. The rest of your attention must be directed toward the cold: keep spare batteries tucked against your body for warmth so they do not drain prematurely in sub-zero temperatures, leave your lens outside for a short period beforehand to acclimate gradually to the temperature differential, and avoid touching metal tripod legs with bare hands. Ultimately, the darker and colder the environment, the more essential it is to thoroughly think through your entire workflow before stepping out the door. Once on location, fumbling for dials in the dark is no longer viable—your hands will tremble, and your focus will unravel first.
Returning to starscapes: the widely circulated "500 Rule," which calculates exposure by dividing 500 by the full-frame equivalent focal length, provides a rough upper limit inherited from the film era rather than a reliable baseline for modern high-resolution sensors. It takes no account of pixel density, aperture, celestial declination, display size, or your personal tolerance for star trailing; today, if an image must withstand close scrutiny at 100% magnification, the actual usable exposure time is often significantly shorter. The table below serves to illustrate the overarching trend that "longer focal lengths necessitate shorter exposures," but should not be followed blindly without verifying the results.
| Focal Length (Full-Frame Equivalent) | Traditional Upper Limit via 500 Rule |
|---|---|
| 14 mm | Approx. 36 seconds |
| 24 mm | Approx. 21 seconds |
| 35 mm | Approx. 14 seconds |
| 50 mm | Approx. 10 seconds |
A more practical workflow is to establish a starting point using an NPF calculator or photography app, take a test frame, and zoom in to inspect it at the scale required for the final output. In the absence of specialized tools, you can halve the result from the 500 Rule as an initial estimate, then fine-tune based on celestial orientation and display dimensions. The rule remains useful, but its utility lies in quickly estimating an order of magnitude rather than guaranteeing pinpoint stars without trailing.
The virtue of the 500 Rule lies in its simplicity; its shortcoming, however, stems from its narrow focus on focal length as the sole variable. As noted earlier, it errs on the side of optimism with modern high-pixel-density sensors. If you seek a calculated value that factors in camera body characteristics and holds up under magnification, turn instead to the NPF Rule (named after the three key parameters: aperture value N, pixel pitch P, and focal length F). Its formula is expressed as:
In this equation, \(N\) represents the aperture's f-number, \(p\) is the sensor's pixel pitch in micrometers, and \(f\) is the lens's actual focal length in millimeters; the resulting \(t\) is the exposure time in seconds during which stars remain sharp pinpoints. Compared to the 500 Rule, it accounts for two additional factors: first, a higher f-number produces a larger diffraction spot, yielding inherently broader star points where slight trailing is less conspicuous, thereby permitting a longer exposure time; conversely, a wide aperture corresponds to a lower f-number where stars are sharper, requiring a shorter exposure—hence \(N\) appears in the numerator. Second, the denser the sensor and the smaller the individual pixels, the more easily an identical degree of movement registers across adjacent photosites as a distinct streak, placing \(p\) in the numerator as well. Precisely because it incorporates both parameters, the NPF Rule typically yields shorter and far more conservative exposure times than the 500 Rule. Taking a 24-megapixel full-frame sensor with a pixel pitch of roughly 5.9 micrometers as an example, the disparity between the two formulas is readily apparent:
| Lens (Full-Frame) | 500 Rule | NPF Rule |
|---|---|---|
| 14 mm f/2.8 | Approx. 36 seconds | Approx. 20 seconds |
| 24 mm f/2.8 | Approx. 21 seconds | Approx. 11 seconds |
| 35 mm f/1.4 | Approx. 14 seconds | Approx. 6 seconds |
| 50 mm f/1.8 | Approx. 10 seconds | Approx. 5 seconds |
What is listed here is the common simplified NPF formula; more complete implementations also take into account the celestial object's position in the sky and intended viewing standards, which is why different applications may yield slightly differing durations in seconds. When in doubt in the field, taking an initial shot with the shorter duration and magnifying it to check, then extending the shutter speed in one-third-stop increments, is far more dependable than starting with the 500 Rule and ending up with an image showing unmistakable star trailing. The values for both rules can be calculated directly for your specific camera body in the Field Toolkit.
When all is said and done, both rules are ultimately ways of scraping by under the ceiling imposed by the Earth's rotation. If you wish to shatter that ceiling altogether, there is indeed a way: make the camera rotate along with the stars. By mounting the camera body on an entry-level star tracker and aligning it with Polaris to complete polar alignment, the mount drives the camera in reverse at the exact angular velocity of the Earth's rotation, rendering the stars completely stationary in the frame. Exposures originally throttled by the NPF rule to a mere few or dozen seconds can suddenly be stretched to several minutes, multiplying the total light gathered tens of times over, allowing the dust lanes of the Milky Way and the faint colors of nebulae to emerge. The cost, however, is that the terrestrial landscape now moves in reverse: after several minutes of tracking, the mountains and trees on the ground smear into motion blur. Tracking the sky, shooting the ground static, and blending the two in post-production has therefore become the standard division of labor in landscape astrophotography. This is the most elegant answer to both the 500 and NPF rules: they govern only stationary cameras, and the moment the camera begins rotating in sync with the stars, both rules gracefully retire from duty.
Whether it is the 500 Rule or the NPF Rule, both are ultimately contrivances designed to keep stars from trailing. Yet viewed from the opposite angle, the streak drawn by a star can itself become the primary subject—and this is star trails. The Earth's rotation causes every star to wheel slowly around the celestial pole; so long as the exposure is sufficiently long, the arcs they trace will accumulate layer upon layer, spinning a series of concentric circles around Polaris (in the Northern Hemisphere) across the frame. There are two paths to photographing star trails. One is simply to make a single, exceptionally long exposure, leaving the shutter open continuously for dozens of minutes to capture the entire trajectory in one take; yet over such an extended span of time, dark current noise and thermal noise accumulate relentlessly, making it difficult to keep the image clean. If you enable in-camera long exposure noise reduction, the camera will shoot a second dark frame of identical duration for subtraction, nearly doubling the total waiting time. The more reliable path is to divide those dozens of minutes into a continuous series of individual shots lasting a few dozen seconds each, stacking them together in post-production. This seamlessly splices together unbroken long arcs while circumventing the heavy noise penalty of a single ultra-long exposure. Putting this method into practice entails several critical details: set each individual exposure to roughly thirty seconds, use the camera's built-in interval timer shooting or an external intervalometer cable release to fire continuously, and compress the interval between consecutive shots to the absolute minimum (within one or two seconds). If the gap is too long, the trajectory of every star will fracture into dashed, broken segments, leaving the stacked arcs riddled with gaps; in-camera long exposure noise reduction must also be switched off, otherwise the camera will pause after each shot for the duration of a dark frame, fragmenting the dashed lines even further. In post-production, blend the frames using a "Lighten" (or maximum value) stacking mode—a standard option across stacking software—so that the brightest pixel in each frame prevails, joining the individual trails into continuous arcs. Facing the identical reality of the Earth's rotation, deep-sky and Milky Way photography strive desperately to evade it, while star-trail photography does the exact opposite, adopting it as its own paintbrush.
Post-Processing Must Respect the Scene
In low-light post-processing, the cardinal rule is to respect the scene. Warm light does not need to be corrected to absolute neutrality; the moment you force the white balance back to standard, the intimate warmth of tungsten filaments, candlelight, and small bistros is washed away along with the color. The image may look clean, but its atmosphere drains away with it. Cool light can likewise be preserved; it possesses its own aloofness and quiet reserve, and is not necessarily a cast that demands correction. When confronted with the clashing hues of neon, resist the urge to crank up every color across the board, which only returns the frame to the raw chaos of the scene; instead, establish a dominant tone first, and pull back the subordinate colors so that the image re-establishes a clear hierarchy of primary and secondary elements. The blue hour inherently provides a natural blue-and-orange harmony—the sky is deep blue, the artificial lights are warm amber, and the two reflect each other. In post-processing, only a subtle touch on contrast and white balance is needed; there is no reason to force the sky into an exaggerated, garish blue that never existed in reality simply to catch the eye.
White balance under mixed artificial light is exceptionally tricky precisely because different light sources cast entirely different hues, and these color casts are rarely just a simple shift between warm and cool—they often carry the green-magenta tint axis discussed in Chapter 4. Laying out several of the most common nighttime light sources makes it immediately clear why a single global white-balance slider cannot rescue the entire frame.
| Light Source | Color Cast | Post-Processing Challenge |
|---|---|---|
| Sodium-vapor (vintage streetlights) | Extremely narrow amber-yellow, poor color rendering | Spectrum is too narrow, virtually impossible to correct to neutral |
| LED | Varies by model, often greenish or with spectral spikes | Tint still requires separate neutralization after color temperature is corrected |
| Neon | Highly saturated monochromatic light (red, blue, green, etc.) | The challenge lies in selection and restraint rather than correction |
The sodium-vapor lamps (streetlights that produce illumination through vaporized sodium) found in older street fixtures emit an extraordinarily narrow, pure amber-yellow concentrated almost entirely at a single wavelength. Their color rendering capability is abysmal, bathing everything they touch in a relentless orange where even reds and greens cannot be recovered; attempting to correct this light to neutral is virtually impossible, and forcing the issue will only cause every other color in the scene to fall apart completely. LEDs, by contrast, are wildly heterogeneous: some skew green, while others feature sharp, jagged spikes across their spectrum; by the time you pull the color temperature slider into place, the underlying green or magenta tint remains stubbornly behind, demanding a separate step to neutralize it. Neon is an entirely different matter: it is inherently monochromatic light of extreme saturation—red is pure red, blue is pure blue. Rather than speaking of "correcting" it, the real challenge lies in deciding what to keep and what to suppress.
Precisely because these different light sources skew in completely divergent directions within the very same frame, a single global white balance will only ever satisfy one of them while ruining the rest. At this point, you must turn to localized adjustments: divide the frame into distinct zones according to their light sources—treating the amber-yellow sodium zone, the greenish LED zone, and the saturated neon zone individually. Use local masks to manage the white balance and tint of each area independently, rather than hoping a single global temperature slider will wipe out the frame's conflicting colors in one stroke. Of course, local masking is not meant to force every color into sterile, standard white, which would only strip away the night's character altogether; its true purpose is simply to restore a visual hierarchy to the image, reining in the colors that threaten to overwhelm the frame and nudging them back to where they rightfully belong.
Once the adjustments are done, step back and ask yourself a single question: does this photograph still look like night? If it looks more like a daytime photo slapped with a blue filter, unnaturally and falsely blue, or like a dark room violently blasted with light—bright everywhere yet entirely flat—it almost certainly means you overdid it in post-processing, stripping away the very quality that made low light so precious in the first place. The value of night lies precisely in the fact that it is not completely illuminated.
Exercises
Find a café or restaurant, have a friend sit by a window or beneath a warm lamp, and shoot 30 frames using a 35mm or 50mm lens with a wide aperture. Back home, select only 5 frames and compare which ones best preserve the darkness and warmth of that moment.
In the same low-light scene, take one shot each at ISO 800, 1600, 3200, 6400, and 12800. Back home, zoom in to inspect noise and detail, and determine your personal upper limit of acceptable quality.
At dusk or at night, find a bright background—such as a window, neon sign, car headlights, or a streetlight—and place a person or object in front of it to shoot a silhouette. Pay attention to whether the outline remains sharp and distinct.
During the blue hour, go to an elevated vantage point in the city and shoot a series of nightscapes on a tripod, taking a shot every few minutes. Compare the frames to see which one achieves the finest balance between the sky and city lights.
Photograph a person using only a single desk lamp, flashlight, or phone screen light. Keep the vast majority of the frame in darkness, using that solitary pool of light to illuminate only a face, a hand, or a corner of their clothing.
Find a pedestrian overpass or high ground, set up a tripod, and shoot a series of traffic light trails with shutter speeds ranging from several seconds to dozens of seconds. From the exact same vantage point, take two shots: one triggered by pressing the shutter button directly with your finger, and the other using a two-second self-timer delay or a cable release. Back home, zoom in and compare which one is sharper.
Choose a clear, moonless or low-moon night to head out to the countryside, and photograph the starry sky with a wide-angle lens. First, take a shot using an estimated exposure time from the 500 Rule, then take another using the shorter duration calculated from the NPF Rule. Magnify both to 100% and compare the pinpoint stars to see whether they remain round dots or have smeared into short streaks.
Next Chapter: Chapter 12 Black and White